


This is my first blog and I will be sharing my journey on learning Ansible everyday.
What is Ansible?
Ansible is an automation tool that is used in manage remote systems and maintain them in a desired state in a particular environment.
Ansible automates the following operations in the IT department.
Ansible Use cases
  -  Cloud provisioning
  - Configuration management
  - Application Deployment
  - Continuous Delivery
  - Security Automation
  - Orchestration
  - Endpoint protection
Basic Ansible Environment Components
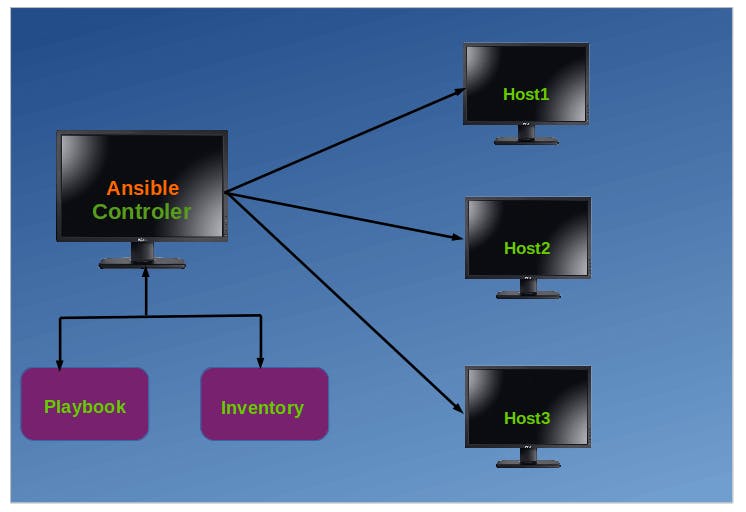
- Control Node
The main host where Ansible is installed. In here we execute commands such asansibleoransible-inventory - Managed Node
Remote system(s) or host(s) that are managed by the control node. - Inventory
A file that contains a list of managed nodes. it is created and stored in the control node. - Playbooks
We will discuss this later.
Installing Ansible
Ansible runs on Linux and Unix platforms. No support for Windows. It is dependent on python
Install Ansible on Linux
Fedora/RHEL/CentOS:
note: You need to install the epel-release, if not installed
note: For the epel in Rhel you need to do the following check steps on the following EPEL workthrough
// check for the repolist install
yum repolist| grep epel
// If no results - install it: - make sure the the versions match
subscription-manager repos --enable codeready-builder-for-rhel-8-$(arch)-rpms
dnf install https://dl.fedoraproject.org/pub/epel/epel-release-latest-8.noarch.rpm
//install ansible
yum -y install ansible
Debian/Ubuntu:
sudo apt-add-repository -y ppa:ansible/ansible
 sudo apt-get update
 sudo apt-get install -y ansible
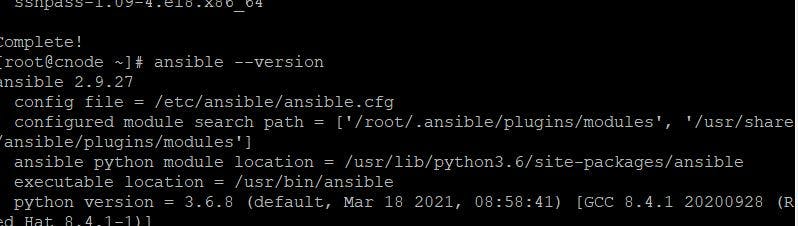
Once ansible is installed; make sure it's working properly:
ansible --version
Create an Inventory File
An Ansible inventory file as earlier mentioned matches servers( IP addresses or domain names) to groups.
The groups can hold multiple host addresses which allow the control node to communicate with the managed nodes.
Lets create a simple inventory file with two servers. Minimum required number of servers is one.
//lets create ansible directory
sudo mkdir /etc/ansible
//create the inventory file
sudo touch /etc/ansible/hosts
//edit the host file using Vim
sudo vi /etc/ansible/hosts
view of the host file
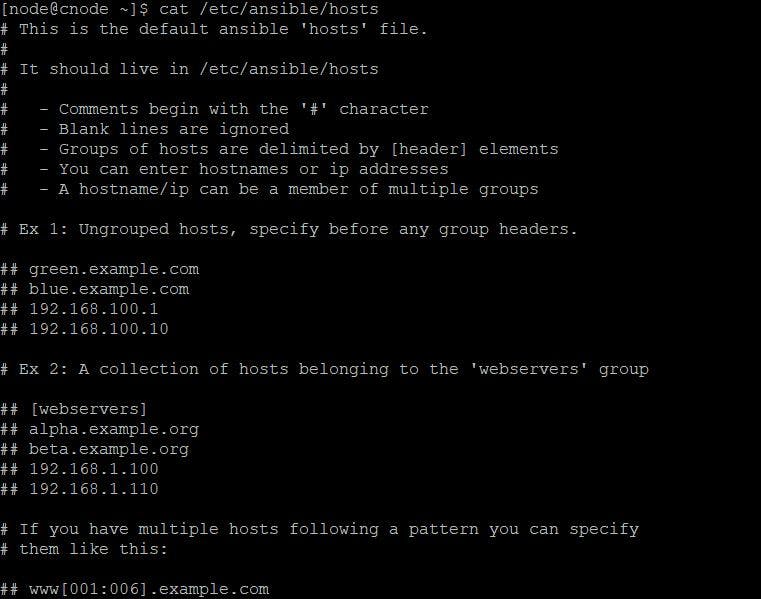 Add the IP addresses of your managed nodes on to the host file . see example below
 // this groups the IP address under a certain category
[myvirtualmachines]
// add your managed node IP address and/or domainnames
192.168.1.76
N/B:
The inventory can have as many groups as required, this will be used in the playbooks to execute different tasks. More information on this later
##Verify the hosts in your inventory.
ansible all --list-hosts
##Set up SSH connections so Ansible can connect to the managed nodes
- Add your public SSH key to the authorized_keys file on each remote system.
- Test the SSH connections, for example:
ssh username@192.168.1.59If the username on the control node is different on the host, you need to pass the-uoption with the ansible command.Running your first ad-hoc commands
lets ping the managed nodes and see if we are successful.ansible all -m ping //or - if the username is different ansible all -m ping -u your_username
What are ad-hoc commands
Ad-hoc commands uses the command line (/usr/bin/ansible) to automate a single task on one or more managed nodes.
Ad-hoc commands illustrate the the simplicity and power of ansible, but they are not reusable like playbooks. They are best for tasks you execute rarely, For example, if you want to power of all machines in your lab for a vacation.
// Ad-hoc command syntax
ansible  [pattern] -m [module] -a "[module options]"
// pattern refers to hostgroup name indicated in the inventory file in square brackets [myvirtualmachines]
//if referring to all host we can replace the host group with all
// here ping is a module
ansible all -m  ping
// here hostname is the module option
ansible all -a "hostname"

Basic Ad-hoc configuration commands
//check hostnames of all servers
ansible myvms -a "hostname" -u user1
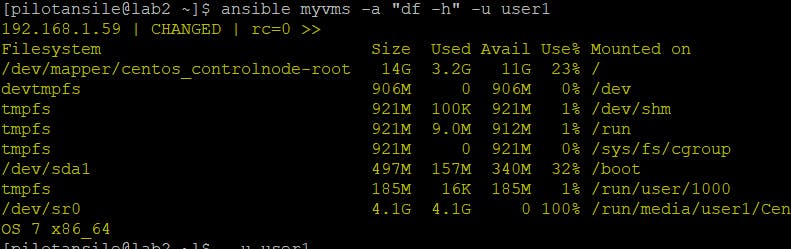
//check whether the servers have disk space available
ansible myvms -a "df -h" -u user1
//check for enough memory on our servers
ansible myvms -a "free -m" -u user1
//check whether date and time on each server is in sync
ansible myvms -a "date" -u user1
Below are images of the response I received from the above ad-hoc commands.


The end of Day 1 learning
Follow the blog for part 2 of 10: Learning Ansible