

Deploy AWS EC2 instances and Connect Instances Via SSH using AWS CLI
Deploying an EC2 instance on AWS without leaving the terminal and enabling EC2 instances to SSH to each other.


Table of contents
- Part A - Deploy EC2 Instances using AWS CLI
- Step 1 - Create a VPC
- Step 2 - Create a public subnet
- Step 3 a - Create an Internet Gateway for the VPC
- step 3b - Attach the Internet Gateway to the VPC
- Step 4 - Create a Route table
- Step 5 - Create Routes
- Step 6 - Associate Route Table to Subnet
- Step 7a - Create a Security Group for the VPC
- Step 7b - Specify rules for the security group created
- Step 8 - Create SSH Key Pair
- Step 9 - Run an instance -athena
- Step 10 - Run instance -Zeus
- Step 11 - Start Instance Athena and Zeus
- Part B - Connect Via SSH from one EC2 instance to another
- Nb: TRUST Should be two ways
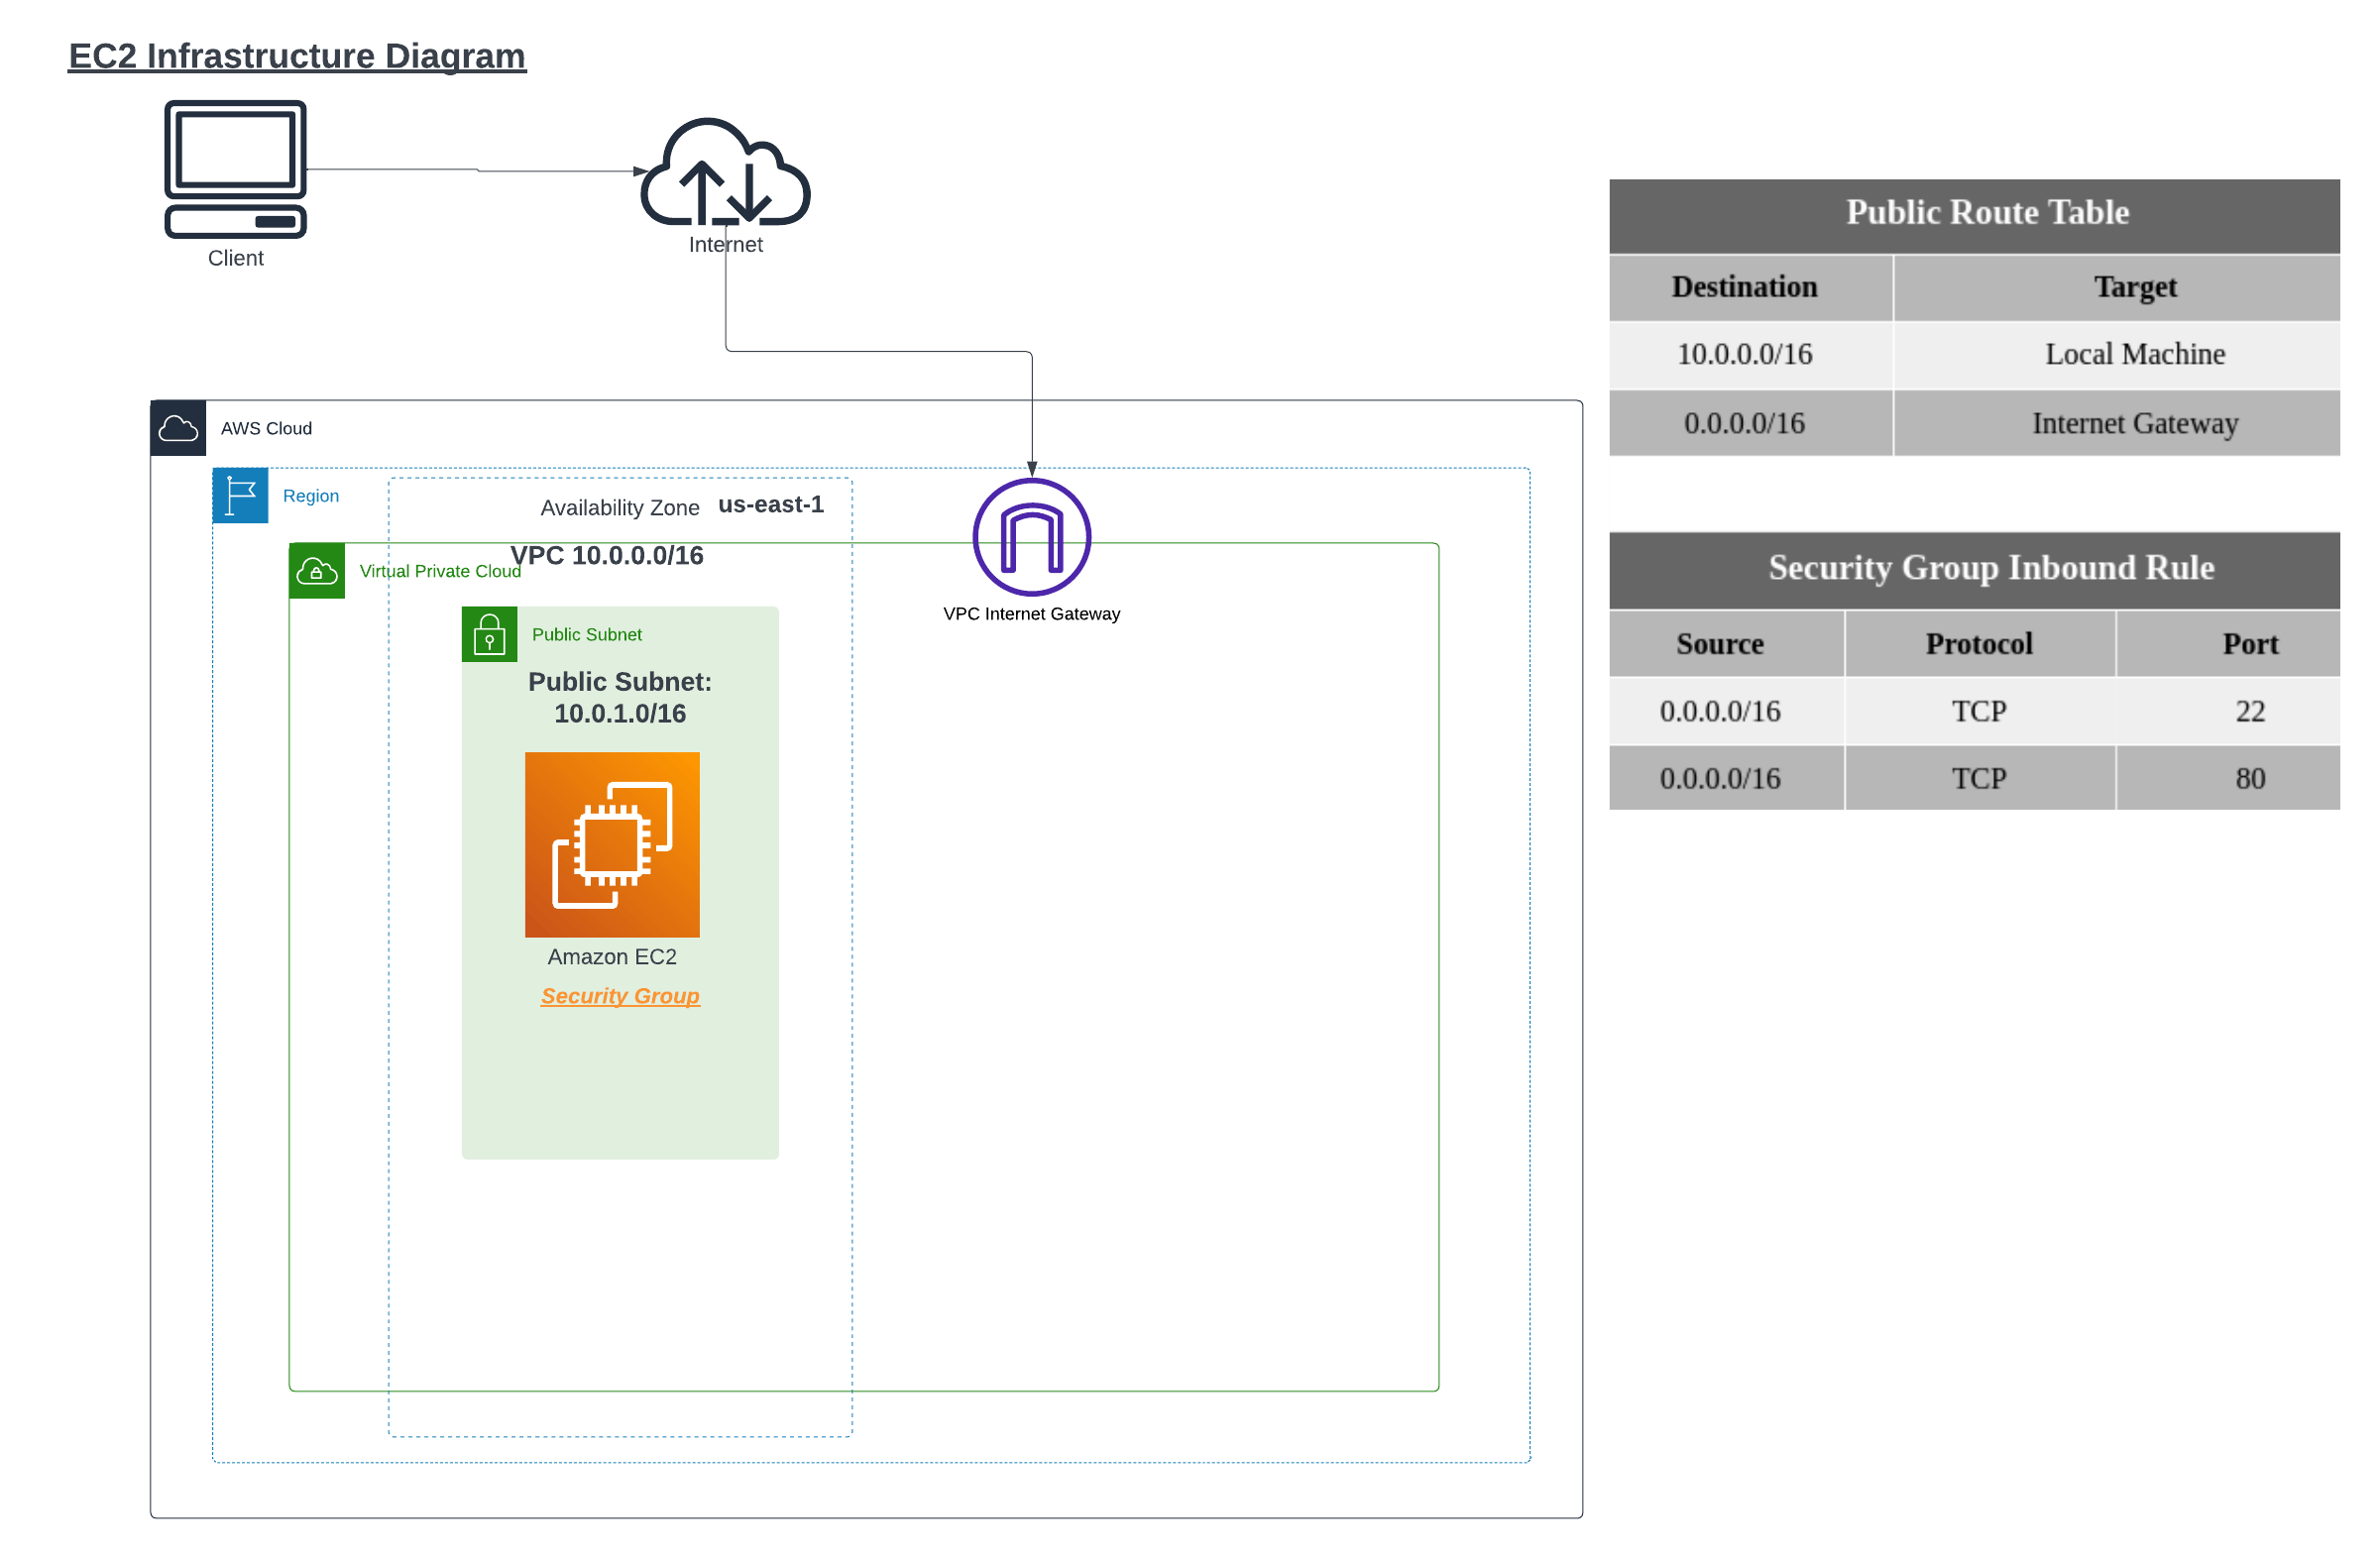
At the end of this lab, my architecture will look like the following image:
Part A - Deploy EC2 Instances using AWS CLI
This article assumes that you already have an AWS account and AWS CLI installed on your local device and you have configured the credentials for access to AWS resources.
If you have the above, let's get started. To deploy an EC2 instance you have to provide the environment where it will be deployed.
VPC
Subnet
SSH Keypair
Step 1 - Create a VPC
VPC (Virtual Private Cloud) is a virtual network that you can create in the cloud, it allows you control over the resources you deploy in the virtual network. Resources that can be provisioned here include EC2 instances, database and storage. To understand how a VPC works check out this link
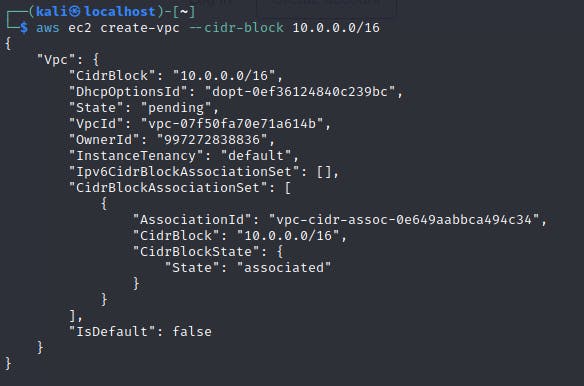
aws ec2 create-vpc --cidr-block 10.0.0.0/16
The terminal should respond with the JSON information about the VPC and the VPCID
Note: Tags should be created to enable easier resource management and cost allocation and management
aws ec2 create-tags --resources <vpc-id> --tags Key=<tag-key>,Value=<tag-value>
The terminal doesn't provide any output for the create-tags command. CIDR stands for Classless Inter-Domain Routing
Step 2 - Create a public subnet
A subnet, short for "subnetwork," is a division or partition of a larger network. It is a way to logically segment a network into smaller, more manageable portions. Each subnet is identified by its unique IP address range. To understand more about subnets check out this link
We will create a subnet and attach tags to it
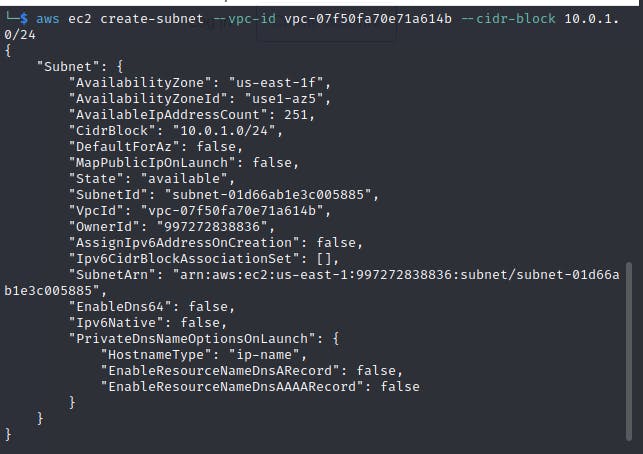
aws ec2 create-subnet --vpc-id <vpc-id> --cidr-block 10.0.1.0/24
You will get a JSON output with the subnet ID. Next, Attach the Tag
aws ec2 create-tags --resources <subnet-id> --tags Key=<tag-key>,Value=<tag-value>
Step 3 a - Create an Internet Gateway for the VPC
An Internet Gateway acts as a bridge between the Internet and the VPC, allowing bidirectional communication between resources in your VPC and the Internet.this link
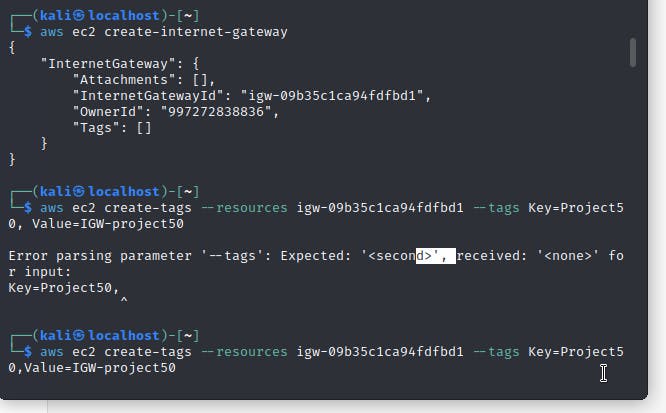
aws ec2 create-internet-gateway
You will get a JSON output with the IGW ID. Next, Attach the Tag
aws ec2 create-tags --resources <internet-gateway-id> --tags Key=<tag-key>,Value=<tag-value>
Note: No output
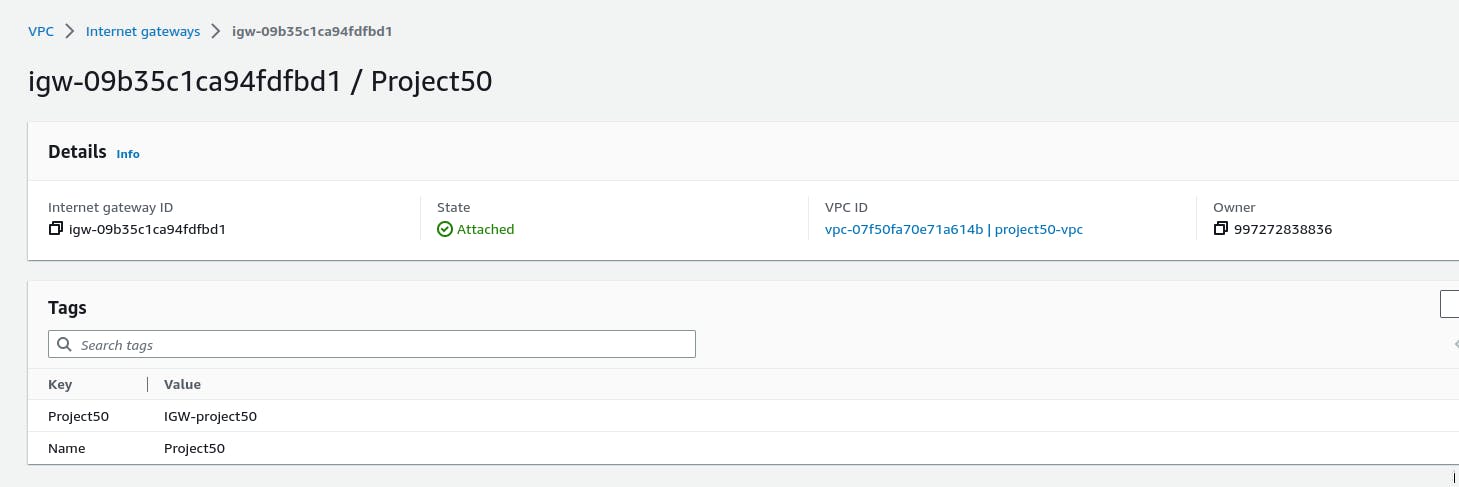
step 3b - Attach the Internet Gateway to the VPC
aws ec2 attach-internet-gateway --internet-gateway-id <internet-gateway-id> --vpc-id <vpc-id>
Confirm attachment from AWS console
Note: Before associating the public subnets to the IGW, we first have to configure the route table associated with the subnets must be configured.
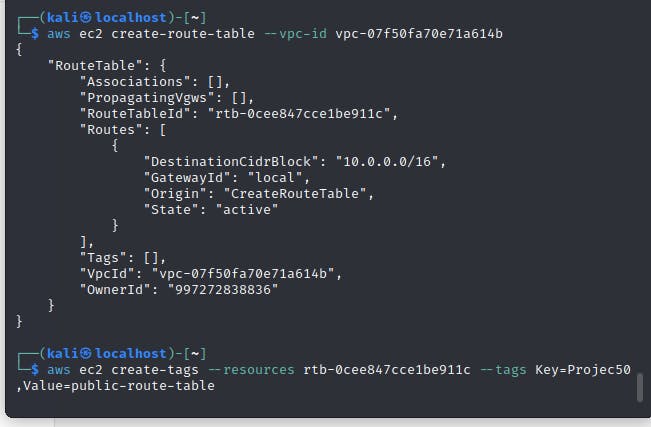
Step 4 - Create a Route table
Route Table is a set of rules that controls the flow of traffic within a VPC. This is enabled by creating routes inside the route tables. Here we are creating a routeing table for the public subnet created earlier.
aws ec2 create-route-table --vpc-id <vpc-id>
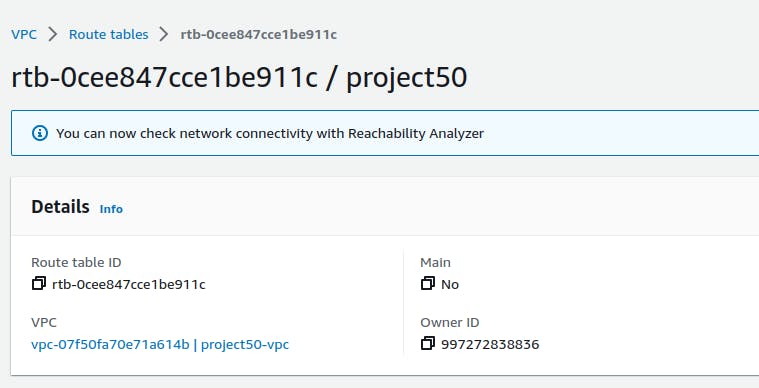
You will get a JSON output with the route-table ID, add tags to the routeing table
aws ec2 create-tags --resources <first-route-table-id> --tags Key=<tag-key>,Value=<tag-value>
Step 5 - Create Routes
Routes refer to networking paths that allow network traffic to travel from its source to its destination. Routes are managed by route tables.
In this step. we will create a route that matches all IPv4 traffic (0.0.0.0/0) and routes it to the specified Internet gateway. The route is also attached to the previously created route table and internet Gateway.
aws ec2 create-route --route-table-id <public-route-table-id> --destination-cidr-block 0.0.0.0/0 --gateway-id <internet-gateway-id>
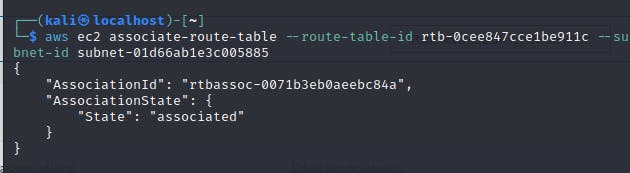
Step 6 - Associate Route Table to Subnet
In this step, we have already created a Route table, and Routes and connected this to the Internet Gateway. meaning we are routing all our internet traffic to the IGW (Internet Gateway). Now we will Associate the public route table with the public subnet created previously.
aws ec2 associate-route-table --route-table-id <public-route-table-id> --subnet-id <public-subnet-id>
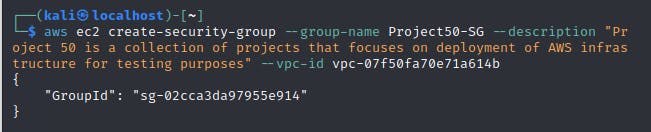
Step 7a - Create a Security Group for the VPC
A security group is a virtual Firewall for an instance that filters incoming and outgoing traffic. You can create two types of rules here;
Inbound Rules - control the incoming traffic to the instance
Outbound Rules - Controls the outgoing traffic from the instance
The security group will be attached to the VPC and the instance we will create.
aws ec2 create-security-group --group-name <security-group-name> --description "<description>" --vpc-id <vpc-id>
JSON output, add tags
aws ec2 create-tags --resources <security-group-id> --tags Key=<tag-key>,Value=<tag-value>
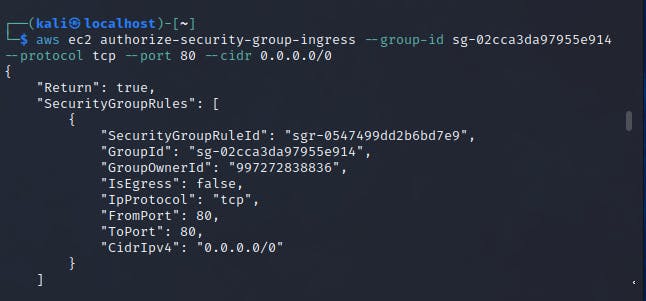
Step 7b - Specify rules for the security group created
in this step, we will specify two inbound rules;
Port 80 allows inbound HTTP access from all IPv4 addresses
Port 22 allows inbound SSH access to instances from IPv4 IP addresses in your network.
aws ec2 authorize-security-group-ingress --group-id <security-group-id> --protocol tcp --port 22 --cidr 0.0.0.0/0

aws ec2 authorize-security-group-ingress --group-id <security-group-id> --protocol tcp --port 80 --cidr 0.0.0.0/0
Step 8 - Create SSH Key Pair
Another requirement to run an instance is an SSH key pair. SSH key pair allows for remote connection from your local machine.
aws ec2 create-key-pair --key-name athena --query 'KeyMaterial' --output text > athena.pem
The athena.pem file remains on your local host machine. To protect the file key from manipulation, run the following command.
chmod 400 athena.pem

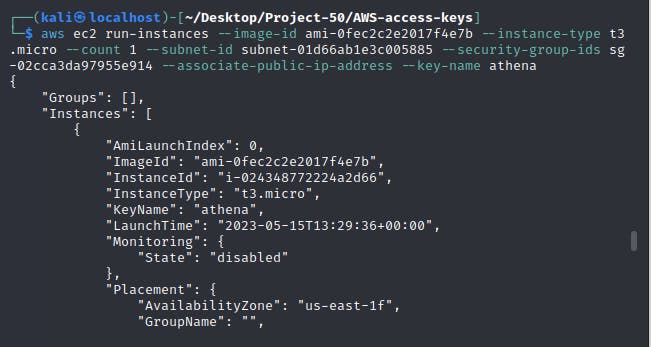
Step 9 - Run an instance -athena
An instance is the provisioned Virtual machine that will run on AWS and will be used o deploy applications on AWS infrastructure. For this project, we are going to create two instances one named athena as the key pair created above and another named Zeus The names of the instances are from the Greek Gods, Athena was the goddess of war while Zeus was the god of the sky.
aws ec2 run-instances --image-id ami-0533f2ba8a1995cf9 --instance-type t2.micro --count 1 --subnet-id <public-subnet-id> --security-group-ids <security-group-id> --associate-public-ip-address --key-name athena.pem
The -- count symbolizes the number of instances you want to create identified by the same key pair - but since I wanted to identify the instance with different Key pairs I will create an additional key pair for the Zeus instance.
Add tags to the instance
aws ec2 create-tags --resources <instance-id> --tags Key=<tag-key>,Value=<tag-value>
Print the instance public DNS name with the following command
aws ec2 describe-instances --instance-ids <instance-id> --query 'Reservations[].Instances[].PublicDnsName'
Step 10 - Run instance -Zeus
Create a key pair for the zeus instance
Run the instance
aws ec2 create-key-pair --key-name athena --query 'KeyMaterial' --output text > zeus.pem
Change Zeus file permissions
chmod 400 zeus.pem
Code to run instance - Follow step 9 to run the instance and create a tag for the instance
aws ec2 run-instances --image-id ami-0533f2ba8a1995cf9 --instance-type t2.micro --count 1 --subnet-id <public-subnet-id> --security-group-ids <security-group-id> --associate-public-ip-address --key-name zeus.pem

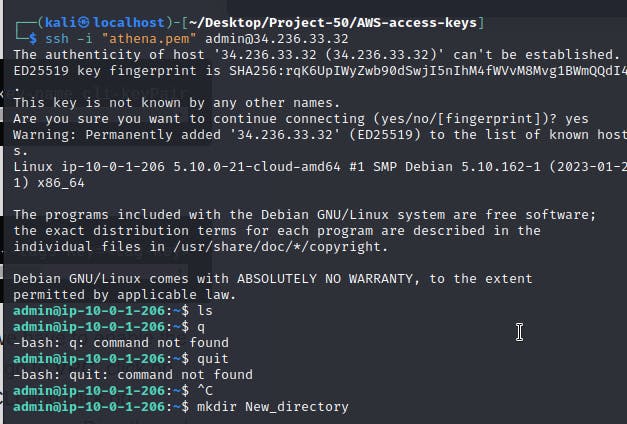
Step 11 - Start Instance Athena and Zeus
Log in to the instance using SSH, and make sure you are in the correct file where you saved the earlier created private key
ssh -i "athena.pem" admin@<instance-public-dns-name>
Try to start the Zeus instance
ssh -i "zeus.pem" admin@<instance-public-dns-name>
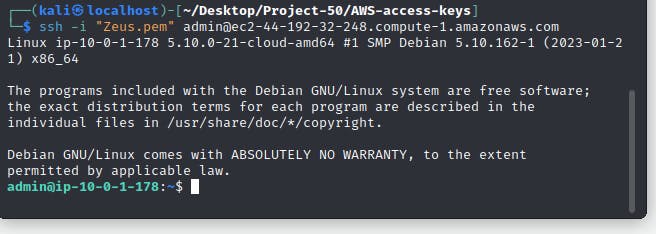
The above shows we can access the two instances from my local machine. Hurray, Part A is Done.
Part B - Connect Via SSH from one EC2 instance to another
When you try to SSH from one AWS instance to another it is not possible since the Instances do not recognise each other. See the output below for an attempt to ssh into Zeus, without configuring the public key first.
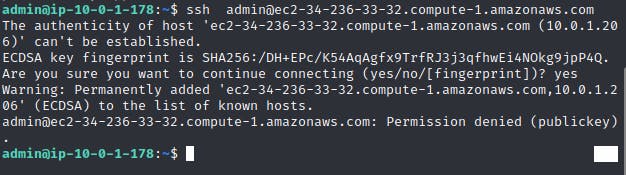
One Key thing to note is that the instance must be in the same subnet and same availability zone.
Primary Step to remember: is that you need to generate key pairs on each server and share the public key between/ across the instance so that they can remotely communicate.
For this project, we are assuming that:
The Athena instance is the sources
Zeus is the destination
Step 1 - Generate RSA keys on Athena
ssh-keygen -t rsa
NB; you can give the key the name you would prefer doesn't have to be the default file name.
On your ~/.ssh folder, you should now see two files. One is a private key (something that's yours only) and a public key(something you share).
Step 2 - Copy the content of the id_rsa.pub
using Vi editor to copy the contents of the public key.
Step 3 - Login to Zeus Instance
Go to ~/.ssh folder and open the authorized_keys file.
Append the previously copied Public key from the Athena instance.
Nb: TRUST Should be two ways
On Zeus, generate the RSA keys (step 1), copy the public key (step 2), and then go back to Athena to append Zeus's public key to the authorized_keys file (step 3).
From Athena, try to SSH to Zeus.
From Zeus, try to SSH to Athena.
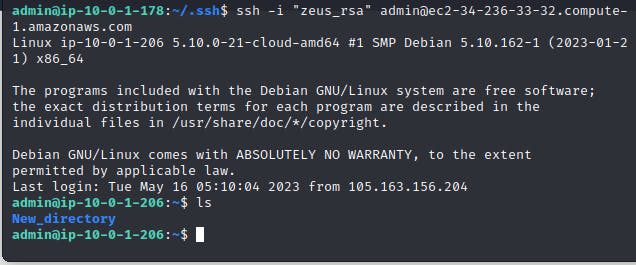
If everything is done correctly you should be able to SSH from Athena to Zeus and vs without any trouble.
Note:
- To prevent a single point of failure, kindly create 2 public subnets in different availability zones such that if one AZ fails the traffic moves to the other one
**Advanced project on the same:
Deploy the AWS instances using AWS CLI and Bashscript
Ensure the architecture is redundant and highly available
**If you get a chance on trying this project, kindly give comments on how helpful it was and what should be improved to make it better.